GM Guide: The Ordeal Strikes
These are the 6 ordeals for the Season of the Chosen.
(This Page has been updated with strategies and loadout suggestions for all the seasonal GM’s)
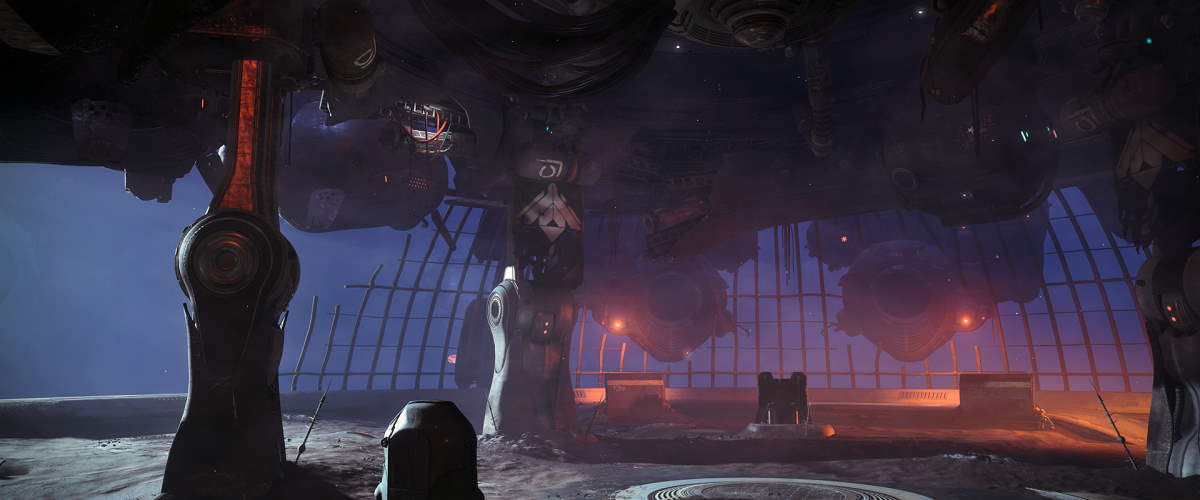
Devil’s Lair
Overload and Barrier champs. Fallen and Hive enemies. High add density and multiple waves. All types of shields. Arc Resistance, Concussive Dampener, Sniper resist.
Class Composition: Tether, Banner Shield, Well of Radiance, Revenant, Shadebinder, Chaos Reach. CWL Mods, one player can run warmind cell build.
Team Weapon Loadout: AB snipers, Overload bows, Anarchy, Xenophage, Rocket Launchers, Arc/Void LMG
Safe loadout for Devils Lair:
Hunter - Stasis with duskfield grenades, hedrons + torment + durance fragment. Mobility and Discipline spec armor. Aeon exotic gloves with Sect of Insight mod. Resonance Siphon artifact mod.
Warlock - Well of radiance with Phoenix Protocol exotic chest. Recovery and Intellect spec armor. Two players can run this warlock setup with a banner titan.
Titan - Banner Shield with Ursa Furiosa exotic gloves. Resilience (60) and Intellect spec armor. Titan should be one of the Anarchy users.
Two players run Anarchy with elemental legendary bows - solar and arc, and Anti-barrier sniper. Third player runs an AB scout, LeMonarque exotic bow and a RL or LMG (arc or solar). Scout user should have Sundering Glare artifact mod.
Start of the Ordeal, hug the right side and run past most adds to the end with a servitor/captain. Clear adds and work on overload champion. Sparrow inside and clear hive, kill the barrier champion. Next room, clear hive and solar wizard on left side first, spawn kill the thrall from the left door, then work on the overload captain. Use Aeon finisher for ammo when safe to do so. Move up towards the right, while keeping cover on the left to avoid snipers. Clear barrier knight and then work on the fallen fighting the wizards. Take out the vandal snipers first, then solar wizards, arc knights and arc captains and finally kill the overload captain.
Jump up on the ledge where the vandals were sniping from, after activating the ghost scan. Use the left side with cover and banner shield super to block damage. Alternate banner and well of radiance to clear adds till the shank wave comes out, then kill the fallen champion and get ready for the second wave. Solar shielded wizards should be killed asap - break shields and spam stasis or grenades on adds. Barrier knight boomer attacks can kill with splash damage, so be careful. Final wave will bring more fallen and two overload captains. Melee vandals will teleport to your platform so use anarchy to trap them. Collect ammo after the room is clear and move to the next area. Overload captain and few adds on the way to the big area with the walker and brigs.
Immediately clear the fallen next to the barrier servitor, use a well. Snipe the vandal snipers on the right side from a distance, then clear the fallen in the building to the left. Moving forward will spawn the walker tank and two brigs, so try to clear as many sniper vandals as you can before. Use the central building for cover and clear the brigs one by one - safe way is to attach anarchy and take cover. Their aerial AoE attack has a big radius and can wipe the team. Jump on top of the central building and anarchy the tank, then snipe the legs. Taking out the walker will stop the fallen dropships from respawning and dropping in more adds. Three overload captains and two barrier servitors remain, take them out one by one by using cover and supers as required. Killing the tank earlier gives you ease of movement and no fear of getting wiped by laser targeting or splash damage. Once the door opens, another overload captain and some adds will come out, clear them and scavenge for ammo.
Move up to the boss arena and rush into the room to the left - that is your safe spot. Two overload captains can be stunned through the windows. Attach anarchy grenades on the boss till it goes immune (⅔ health). More adds will come rushing, trap with anarchy and kill them from the safety of the room while using banner shield and well(s) to keep alive. Monarque player should break the void servitors shielding the boss. Anarchy the boss till two more overload captains spawn, kill them similar to the previous champions. Watch out for exploding shanks and resilient vandals. There will be a couple of adds under the room, go down and kill them so you can use that spot to damage the boss till the next wave of void servitors come out. This is it, break the shields and attach anarchy on the boss till it dies.
Arms Dealer
Barrier and Unstoppable champs. Void shields. Grounded. Arc Resist, Solar Resist, Concussive Dampener. Boss can be summoned early for extra damage while riding the elevator up - nuking the boss is recommended. Medium-Long range engagements.
Class Composition: Tether, Chaos Reach(x2), Thundercrash(x2). Well and Banner if you don’t nuke boss. CWL mods.
Team Weapon Loadout: AB sniper, Unstoppable HC, Anarchy, RLs, Xeno, Ticcu’s, Izanagi, Eriana’s Vow. Sundering Glare artifact mod.
Safe loadout for Arms Dealer:
Hunter - Tether (bottom-tree) with Aeon Gloves, Frost-EE5 or Orpheus Rigs. Mobility and Discipline armor, 50+ resilience recommended.
Warlock - Chaos Reach with Geomag boots. 90+ Intellect armor, 50+ resilience recommended. Alternatively, Well of Radiance with Phoenix Protocol.
Titan - Thundercrash with Falling Star chest. High resilience and Intellect armor. Alternatively, Banner Shield with Ursa Furiosa gloves.
Arms Dealer is a repeated GM and the strategy involves nuking the boss to as low health as possible, if not outright killing him. The boss can be summoned early which allows us to damage him more than normal, so a combination of tether hunter and two chaos reach warlocks is ideal for range and burst.
Hunter should run an AB scout with Sundering Glare artifact mod. Combine with an overload Exotic bow - Ticcu’s or LeMonarque. Even though this GM does not have any overload champs, overload bows debuff enemies and allow you to engage from range. RL for heavy. (Can also run DMT + void HC + RL). Deathbringer is also a viable option.
Warlocks and Titans should use AB snipers with at least one person running an unstoppable Hand Cannon (explosive payload recommended) and Anarchy.
Grounded modifier is active so try not to jump while taking damage. The cabal will spam sticky nades so high resilience is recommended. If you get stuck with a nade, it will most likely one shot you. Solar resist and Concussive dampener will allow you to tank fatal damage from snipers, grenades and incendiary champions. The void grenades left by psions on the floor are deadly.
From spawn, bait the unstoppable champion by shooting in the direction of the adds, stun and dispatch with anarchy and snipers. Be careful while using finishers on unstoppable cabal champs, they can blow and wipe the fireteam if a player is shooting the tank on their backs. Clear the minor ads (void shields) and split up to defeat the AB colossus. Initiate scan and head out the door. Keep towards the left side and either blow up the cabal thresher, or wait for it to go away. Take out the phalaxes and legionaries, and prioritize the psion snipers hiding behind the boxes. The next wave will drop and you will have to deal with an unstoppable champion. Once the room is clear, pick up the solar orb then drop it to despawn.
Drop down and spawn trap the cabal warbeats with anarchy, then dispatch the barrier champion on the ledge. Stay at range and let the scout player apply sundering glare wherever possible. The thresher on the right side can one shot so either take it out or let it fly away. Hunter should invis the team and everyone should go far right and bait the dogs away from the second barrier colossus. You can use the elevation to head glitch the champion and avoid his attacks. One player goes back to get the solar orb, but right before the dunk, place two anarchy traps on the spawn door to the right and the force field up ahead. Kill the unstoppable champion and other adds to proceed.
After killing a few more cabal and coming out into the big open patrol area, head down to the left and sparrow under the large ship to the other side. From there you can safely jump up to the ramp and deal with the barrier champion, but watch out for two sniper psions. This way you can ignore all the fallen enemies and cabal threshers. Sparrow through to the area with the two tanks. Stay at the entrance and split up - the tank can wipe out the fireteam if you’re bunched up. Snipe the 4 legs off the tank and use chaos reach. Kill the adds that don’t run away and move inside to the right, where the first elevator button is, and activate it. Use that area to take out the remaining adds(void shields) from range, and the unstoppable champion.
There are two barrier champions up top - good idea for one player to go far right and jump up near the second elevator button to flank them. Once both champs are dead, activate the button and get ready to place anarchy traps on the bridge and the tank. Use tether and chaos reach to damage the tank then back away once the three unstoppable champions start rushing forward. Safely keep on backing away and repeat the stun + damage combo till the champs are dead, then finish off the tank. Snipe the elite centurion and clear the warbeasts to proceed to the final room before the boss fight. Scan and open the door.
Stay on the lower level and clear the flame turrets while watching out for the unstoppable champion, who can rush you. Clear the adds and two phalanxes then jump up where you destroyed the turrets. Clear the second wave of turrets and use cover to kill the remaining adds before engaging the two barrier champs. Best to split up and use snipers at range to deal with them. Once the room is clear, head to the elevator but DO NOT activate the button. One player should jump up on the elevator chains and reach the top of the chain - this makes the boss come out earlier than usual and you can damage him as you’re riding the elevator up. Activate the button once the jumper is on top and kill the cabal that dropped from the pod. The jumper should have rejoined the rest of the team before killing the last add. Boss will be standing on the ledge and you can tag him with anarchy and snipe him as you’re going up. His sniper shot can be fatal so try not to get hit by it. When you’re about to reach the top, reapply anarchy and back away, then use tether + both chaos reach to burst him down. If the boss does not die, back away and shoot him as he’s trying to get to the top of the pillar. If he’s under a third of his health bar, he will jump back down and you can finish him off without having to deal with any adds.
If you’re not running the aggressive boss kill loadout, use the safe banner + well loadout for boss room. This will extend the fight by a long time and you will have to deal with a lot of adds, two threshers, flame turrets and the boss sniping you from the platforms. The corner to the far right (under the boss pillar) is a good spot to bait adds and use supers from. Invis hunter should dunk the solar orbs. In the final phase the boss can aggro and chase you.
Proving Grounds
Barrier and Unstoppable champs. Cabal enemies, a few Vex. Mostly Void and Solar shields, a couple of Arc shields. Solar resist, Concussive dampener, 50+ resilience.
Class Composition: Tether, Banner Shield (x2), Chaos Reach. CWL Mods (Taking charge, High Energy Fire, Protective Light)
Team Weapon Loadout: AB snipers, AB scout, Void and Solar Unstoppable Pulse rifles, Anarchy, Void RL, Xeno, Ticcu’s. Sundering Glare artifact mod.
Safe loadout for Proving Grounds:
Hunter - Tether (bottom-tree) with Aeon Gloves recommended. Mobility and Discipline armor, 50+ resilience recommended. OR Revenant with Aeons.
Warlock - Chaos Reach with Geomag boots. 90+ Intellect armor, 50+ resilience recommended.
Titan - Banner Shield with Ursa Furiosa gloves. 90+ Intellect, high Discipline and 60 resilience. Suppressor grenades. Two players can run this setup with a hunter or warlock.
Hunter should run AB scout with Sundering Glare artifact mod. Combine with an overload Exotic bow - Ticcu’s or LeMonarque. Even though this GM does not have any overload champs, overload mods debuff enemies and allow you to engage from range. Void RL for heavy, auto loading holster recommended.
Warlocks and Titans should use AB snipers and both players should have unstoppable Pulse Rifles (Void and Solar), and Anarchy. Sundering Glare mod works with Pulses.
This GM is intense and will prove a challenge, so be prepared to get a couple of practice runs in before you get a clear. Tank room and boss room can get stressful very quickly, but there is a lot of time and cover - positioning and coordinating champion breaks is key.
Clear the cabal and vex fighting each other, and watch out for turrets - clear everything at range. Unstoppable champion can be sundered and finished for ammo. Move up but watch out for the drop pods and barrier champion. Play this GM at range and use those AB guns to take out champs and majors/elites. Turrets on both sides should be sniped before moving forward. Clear the rest of the adds, including two unstoppable champions. Majors can be finished by Aeon hunter for special ammo. Once the first boss arrives, tag with anarchy and back away till he shields himself. Clear the add waves and two more unstoppable champions, then use the titan banner shield to aggro the boss inside his barrier bubble while the other players shoot the shield generator. Tether/Chaos reach the boss and move into the land tank, killing the three adds on the way to the tank room.
Before jumping down, clear a few adds from up top. Invis, jump down and go either left or right behind the blast shields and snipe the two psions on the balconies. Try to kill the two interceptor psions (void shields) first - they will one shot you with a direct hit. I prefer using a void RL to kill them asap. Clear the rest of the adds, the random miniboss (arc/solar/psion) and blood guards (solar shields). Waves of cabal warbeasts will spawn from under the balconies after you kill the two barrier champions. Leave the interceptor psion near the tank doors for last. Collect ammo and make sure everyone has supers for the next part.
The tank fight can be made easier by quickly targeting and bursting down the two barrier champions. They are aggressive and can rush you, and also love shooting through cover. As soon as the tank doors start opening, snipe the two psions on the balconies. Then use the banner shield and snipe the barrier champs asap; hunter can tether to keep the adds from flanking. Sunder one of the tanks and use chaos reach + snipers to kill it, then work on the other tank by splitting up. Tank splash damage on a wall behind you can kill, so be very careful about positioning. Clear the rest and move forward to reach the orb rooms.
There will be an unstoppable champion and a random elite. Kill them from a distance and move ahead, take care of the sniper psion on the left side. Pick up the orb to spawn more adds from the opposite side and kill them from a distance - the gladiators can get up close very quickly. Snipe the turret to the left inside the next room, and use that spot to kill the barrier champion and two majors in the room. After dunking the first orb, clear the other orb room from range - Barrier champion, three turrets, psion snipers and a miniboss. Killing the miniboss will spawn more adds and a barrier champ in the main room. Clear them and dunk the second orb. Watch out for debris while jumping around in the orb rooms.
After dunking both orbs, use supers to clear the final add wave of this area - one unstoppable champion, one barrier champion and lots of warbeasts and major cabal troops. Use Aeon finishers to top off heavy and sniper ammo. Scavenge for ammo and then ride the elevator up to the boss room. The door where you enter the boss room is where you will likely stay for most part of this fight. Activate the panel to refill supers and summon Caiatl’s champion. Anarchy players should tag him with 2 shots and back off to the door, while the other player applies sundering glare and shoots the solar orbs.
This encounter can get overwhelming very quickly if players die to solar orbs/bronto cannon, so keep on moving and use cover, while shooting all the solar orbs summoned by the boss. Clear the add wave and keep on damaging the boss till he’s down to 2/3rd health, use a banner shield if required but try to save it for when the boss gets shielded. The first shield phase is the toughest part of the boss fight because he will spam the solar orbs and his bronto cannon from inside the bubble while two unstoppable champions will rush for you.
Try to kill one champ asap, use tether/chaos reach after stunning it to burst it down, and banner shield to block the orbs and other champion. The raised pillar near the door is good cover and can block most of the orbs if you stay behind it. The boss gets tired of shooting the solar orbs after roughly a dozen blasts. This is when you move up to break the shield generator by using the two pillars on the left and right edges of the bubble - place anarchy and grenades. One player can aggro boss while the others shoot. When the shield is broken, damage the boss down to his final chunk of health and clear the next wave of adds. Boss will jump up on his fiery platform and shield up for the final time, and send forth the final pair of unstoppable champions.
Fall back and kill both the champs, finisher for ammo if required. You can either keep on shooting the orbs till he cools down or start baiting them while moving close to him. Let one player bait and run under the platform to lose aggro, then split up and jump up to break the shield generator - one player keeps agro while others shoot. When it’s broken, the boss will jump down and summon the last wave of adds. Get back to the safe area and use a banner shield to block while the other players burst him down with heavy, snipers and super.
Congratulations, you have proven yourself worthy of being the Vanguard’s champion, your bottomless grief + unrelenting adept gun awaits! (Videos showing boss and tank room clears uploaded, check the discord).
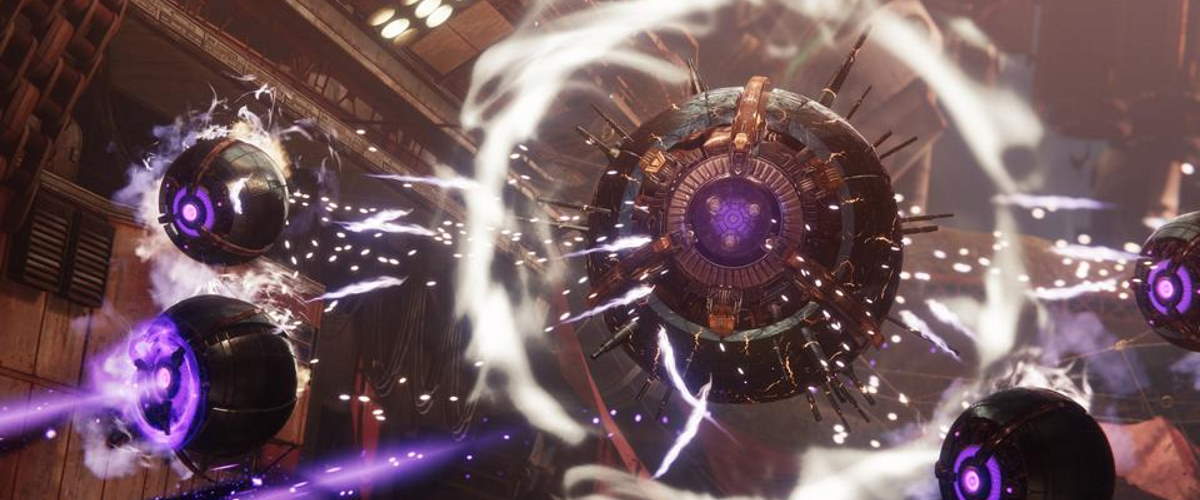
Fallen S.A.B.E.R
Overload and Barrier champs. Fallen enemies. Boss has 4 phases. Boss room has sniper shanks, exploder shanks and barrier servitors. Arc captain and Void servitor shields. Arc or Solar resist, Sniper resist or Concussive Dampener. Riskrunner is very good for adds. Sword for champs and invis marauders. Overload bows (void and arc). Anarchy and Xenophage. Blinding GL, suppressor grenades and Cellular suppression for add control. Lucent Blade mod is a must for sword player.
Class Composition: Banner Shield Titan, Well of Radiance Warlock, Stasis Hunter.
Team Weapon Loadout: AB snipers, Overload Riskrunner / Overload bows, Anarchy, Sword, Xenophage.
Safe loadout for Fallen Saber:
Hunter - Revenant with Aeon Gloves. Duskfield grenades, hedrons + torment + durance fragments. Mobility + Discipline armor. Resonance Siphon artifact mod. 50+ Resilience. OR Tether (bottom-tree) with Aeon Gloves, Omnioculus or Sixth Coyote. Mobility and Discipline armor, 50+ resilience.
Warlock - Well of Radiance with Phoenix Protocol. Recovery, Discipline and Intellect armor. OR Chaos Reach with Geomag boots. 90+ Intellect armor, 50+ resilience. OR Shadebinder with Verity’s Brow or Aeon Gloves. High discipline + Intellect armor. Duskfield grenades, hedrons + torment + durance fragments. Resonance Siphon artifact mod.
Titan - Banner Shield with Ursa Furiosa gloves. 90+ Intellect, high Discipline and 60 resilience. Suppressor grenades and Towering Barricade. OR Bubble with Helm of St.14 or Aeon Gloves. 90+ Intellect, 60 Resilience.
Saber GM is pretty flexible in terms of class makeup, build and weapons. You can play very safe with 2 Banners and a Well, or 1 Banner and 2 Wells; or get aggressive with stasis and sword(s). Add control abilities and weapons are very useful. AB snipers to deal with servitor champions, overload bows for captain champions. Anarchy for add control traps and sustain damage to boss, Xeno for quick ranged bursts and Sword for add clear and champs.
Hunter players can run Riskrunner with Overload mod, a Sword with Passive guard and AB kinetic sniper. This allows very aggressive play for add clear and dealing with overload champions and close range melee adds. Stasis excels in stun locking the overload captains and suppressing annoying adds like resilient marauders. Resonance Siphon mod lets you get back stasis abilities very quickly, while the super can control rooms very effectively.
Warlocks can run Xenophage with solar warmind build and well of radiance. Xeno allows for quick burst damage to dispatch major vandals, marauders and shanks with added bonus of warmind cells to clear adds. Pair Xeno with AB sniper and overload bow. Well of radiance also lets you kill adds shielded by servitors. Focusing Lens artifact mod if running with a stasis teammate, it buffs weapon damage from inside the well on targets affected by stasis.
Titans should run Banner Shield with Ursa gloves. Anarchy, Blinding grenade GL, overload bow, and suppressor nades. Titans job is to feed orbs to other players, and block melee adds that rush you. Standing behind the Titan is risky when melee adds are attacking because they can punch you through the banner shield. Bubble Titans can run sword and aggressively clear adds with St14 Blessing of Light and Force Barrier overshield.
Sparrow to the Warsat and avoid getting killed by patrol adds on the way. Scan and back off towards the tree line after 5%. Snipe the fallen skiff guns, takes about 3-4 sniper shots per player. Riskrunner/Stasis player should go to the warsat while the others stay back and snipe adds with bows. At 25% the resilient marauders will drop and everyone should back off. Use blinding/suppression nades and take them out - they can one shot you very easily. The overload champ and more adds will drop at 33%, prepare to rotate to the other side when that happens as the 2 fallen skiffs will deploy near the tree line. After clearing that wave, stay in the warsat and snipe the guns off the skiffs, back off at 55% to deal with the barrier servitor. Use a well of radiance and snipe the champ, then deal with other adds. At 73%, the final skiff will arrive so move back to the tree line to snipe its guns off. Use the stasis super at the add spawn while the banner titan should super inside the warsat circle so the other players can kill the overload champion and rest of the adds. At 100% any remaining adds will despawn.
Head down into the bunker and drop a well of radiance near the box to the left of the door. Quickly clear the shanks, and focus the sniper and resilient vandals. As soon as the invis melle adds start rushing from the left side, place Anarchy traps and use the banner shield to block them. Use stasis grenades and sword to kill them while they are suppressed by the shield. If the barrier servitor is shielding the overload champ, snipe it with AB guns. This will summon another overload captain and more shanks. To avoid having to deal with two overload champs at the same time, try to kill the first overload champ before killing the servitor. Once cleared, activate the panel and decide how you want to play the next part.
One option is to stay near the panel after shooting it, use a well and/or banner to kill the adds from range and then move up to clear the two overloads. Another option is to move right side into the passage where the melee adds spawned from previously, and use that cover to take out adds. Watch out for sniper shanks and invis marauders - you can spawn trap the marauders with Anarchy. The other, more aggressive option is to back off inside the tunnel - this is where the two champions will spawn and you’re trying to spawn kill them with anarchy traps and sword. Plant a well or banner as soon as the panel is shot, then stun the overloads. Throw a stasis grenade/super and sword them down asap, use aeon finishers for ammo. Xeno the marauders from range and then drop down into the shaft leading to the arc room.
The arc room is very simple - snipe the 2 shanks, and let one player go to pick up the orb. DO NOT shoot any shanks that spawn after, and back away from the stairs to avoid getting blown up. The orb carrier can follow after the lightning charge has passed and dunk the orb safely; the warlock can drop a healing grenade for safety. The shanks will shortly despawn. Banner titan can also block the adds/lightning but it’s not required. Move into the next room and use a well to kill the initial wave of adds. Use a banner shield when the marauders spawn and stasis super to suppress them, then snipe the barrier servitor. Move up on top of the stairs to the left and work on the overload champs, and the next wave of adds. Watch out for exploding shanks and melee vandals.
Before entering the final room before the boss, snipe the barrier servitor from outside, and then snipe the sniper vandals. This will make the next room easier. Clear a few dregs and vandals on the side and use stasis super to stun lock the three overload champions. Tag them with anarchy and keep them stunned with overload bows so that the sword player can get close and finish them off. Collect ammo/orbs and jump down into the boss room - try not to die on the slide as it can put the revive in an awkward spot. Clear the two void servitors and a couple of shanks to start the boss fight.
The boss fight can either be very simple or a massive pain, depending on your placement and boss burst ability. I recommend going left to the stairs from where you drop down into the room and quickly burst down the boss with Anarchy, Xeno and snipers - shoot its front thrusters for crit damage. After losing 1/4th of it’s HP, the shank boss will get shielded and teleport away. This is the sniper phase and very lethal. Use the left cover to shoot normal shanks (they spawn indefinitely). As soon as the barrier servitor spawns, snipe it down and plant a well on the spot where the boss shank will teleport down to. Use heavy weapons and sword to burst it down to half HP asap because the sniper attack will one shot, even inside the well. Alternatively you can stay near the left side and use the banner shield as cover to shoot the boss from range.
In the next phase, the boss will spawn indefinite shanks and another barrier servitor. This phase can be used to build supers and ammo reserves, if required. Once you have supers and ammo, drop a well of radiance and snipe the barrier servitor to bring the boss down to its final phases. Infinite exploding shanks spawn - don’t let them get close, and if a weak shank does get close, use a finisher to avoid getting blown up. Burst the boss down from the well to the last quarter, which is the arc and final phase. This is when you can either use the banner shield (tag boss with anarchy first) and burst the boss down with snipers and Xenophage. Stasis super will help in keeping the adds and sniper shanks suppressed. Alternatively, use banner shield to block the boss up close so that the sword player can quickly spin to win with Fallen Guillotine. Use stasis super/grenade for stun and bonus damage; Xeno player can stay at range and snipe the shanks while helping with boss burst. Boss explodes, you win!
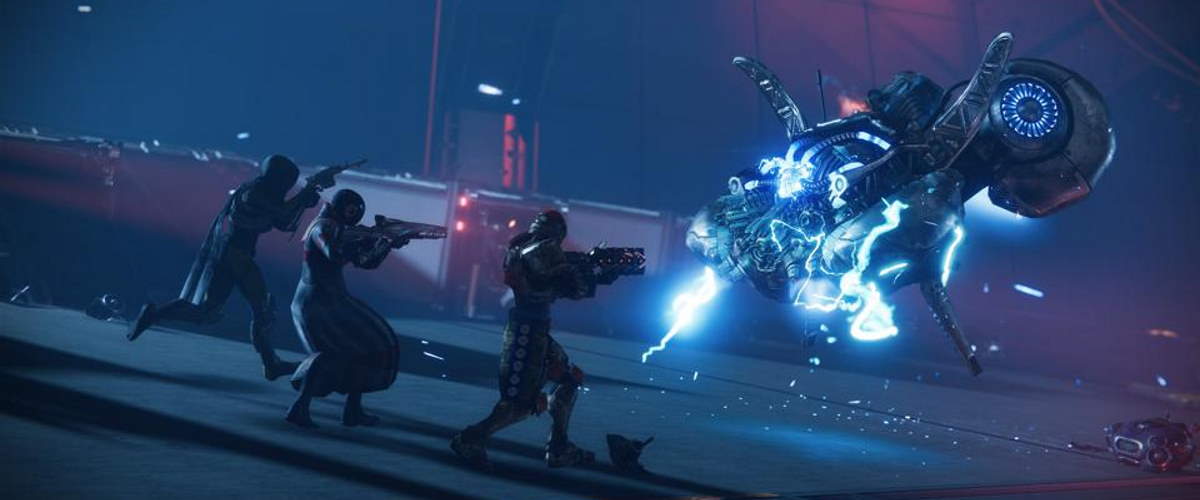
Warden of Nothing
All champions. Vex and Cabal enemies. Void shields. Boss has to be nuked. Solar resist, Sniper Resis, Concussive Dampener. Boss damage - attach Anarchy, Sunder + Tether, then Chaos reach and/or Thundercrash.
Class Composition: Tether, Chaos Reach (x2), Thundercrash(x2). Chaos Reach is better than Thundercrash.
Team Weapon Loadout: AB snipers, Unstoppable HC/Pulse, Overload bows, Anarchy, Rocket Launchers, Overload sword.
Safe loadout for Warden of Nothing:
Hunter - Tether (bottom-tree) with Aeon Gloves, Assassins Cowl or Orpheus Rigs. Mobility and Discipline armor, 50+ resilience recommended. Bakris Revenant optional.
Warlock - Chaos Reach with Geomag boots. 90+ Intellect armor, 50+ resilience recommended.
Titan - Thundercrash with Falling Star chest. High resilience and Intellect armor.
Warden is a repeated GM and the strategy again involves nuking the boss to as low health as possible, if not outright killing it. The combination of a tether hunter for damage and debuff plus two chaos reach warlocks or two thundercrash titans is ideal for boss burst.
Hunter should run an AB scout with Sundering Glare artifact mod. Combine with an overload bow or unstoppable pulse/hand cannon. Anarchy or RL’s for heavy.
Warlocks and Titans should use AB snipers with one person running an unstoppable weapon and the other an overload bow. Pair with Anarchy.
It’s a pretty chill GM overall and players only need to be cautious in the room with the mines. AB snipers will make dealing with the champs very easy. When you get to the open room with the overload minotaur, don’t shoot it till you have cleared the initial add wave of goblins and fanatics. Stun and kill the overload last, then move into the train section. Make your way down to the hydra mini boss and use anti-barrier snipers to shoot it through the shields; watch out for the splash damage. Stun and dispatch the unstoppable champ, then move up to deal with the barrier hobgoblin. Try not to die to the trains or random vex adds while moving forward. Blow up the explosive barrels and deal with the unstoppable incendiary champ. Take down the rest of the cabal adds, then snipe the barrier colossus from a safe distance.
In the next room, stay at the base of the stairs and snipe the hydra but be aware of the two barrier hobgoblins. Solar and sniper resist will help in tanking their one shot line rifles. Good time to use tether on the vex near the hydra, then deal with the champ on the right side from cover (do not go past the train). Kill the champ on the left and move up, take down all the vex and explosive barrels till the big minotaur boss teleports out - burst it down with chaos reach/thundercrash. Head up through the lift and snipe the major cabal adds from range and let the two unstoppable champs come to you, ideally one after the other so you can kill them easily. Watch out for the sniper psions and dispatch them from range; alternatively the hunter can invis everyone and you can run through to the lift taking you up to the minefield.
First thing to do in the mine room is going round the back (towards C mine) and activating or shooting all the fallen mines on the ground - you don’t want to deal with them later. Move towards mine B and take out psions and regular adds from range, then work on the champs. There should be an overload minotaur and two vex barrier hobgoblins. For some reason, Bungie removed two additional champions from this room. Try to aggro the overload champ away from the cabal and kill it asap, then deal with one barrier champ next, and scrounge for ammo before taking out the second hobgoblin. That will start the mine phase.
This is the toughest part of the GM but comfortable if you don’t panic. Spawn trap the vex hobgoblin champ with Anarchy near mine A and have one player kill the 4 goblins coming out from the other door. Aggro the unstoppable champ towards mine A, and once its dead, capture A. The mines have a very long timer and you can get off the cap if required. Clear the adds near mine B, then either send 2 players or all 3 to cap B. There is only one overload champ remaining on the ramp in the middle and you don’t even need to kill it. Just tag it once and head over to mine C, avoid the left corner where some cabal and vex are shooting each other. Either the invis hunter can cap C solo, or everyone can help - be careful of the giant minotaur and goblins spawning from the back. Use supers to kill the giant minotaurs (void shields) if required. Once C has been capped, one player can quickly grab the scorch cannon and everyone should move towards mine B. Stay at range and kill the colossus miniboss to unlock the next area.
Head down into the treasure room (watch for fall damage) and go down the lift. Bumping into each other in the lift can cause a player to die, so be careful. When you reach the bottom of the lift, stay there and stun the overload champ. Keep it stunned and let the cabal champs kill it. You can assist with some snipes and anarchy, but keep the overload stunned. Next, stun the unstoppable, sunder and snipe it. Jump down to the boss room and use the cover on the right to dispatch the barrier colossus (there used to be two colossi but Bungie removed one). Make sure everyone has supers and anarchy ammo before killing the last and final barrier hobgoblin.
Prepare for boss nuke. Hunter should stay far away (ideally at the back of the room where you dropped down from top) and tether once, then sunder the boss. Everyone should attach two anarchy on the boss and unleash supers. Chaos Reach and Thundercrash should wait on the left and right sides till the boss gets tethered. Make sure you have clear line of sight to super the boss. If done correctly, the boss will die right as your supers run out. If the boss has some health left and/or manages to teleport, quickly tag it with more Anarchy shots and get to cover. (Invis hunter can stay hidden incase players die to adds or solar flare). Stay in cover and don’t aggro/shoot any adds while the boss is doing the solar flare AoE. Use your rifts, barricades and invis. If the boss has not died to anarchy yet, peak out of cover and re-tag till it dies. Your Treasure awaits!
Insight Terminus
Barrier and Unstoppable champs. Some Vex but mostly Cabal enemies. Lots of one-shot sniper psions. Boss room has limited cover, boss cannot be nuked. Void shields on Vex minotaurs and Incendiors. Arc/Void Resist, Concussive Dampener, Sniper resist. Stasis and/or Suppression builds ideal for boss room.
Class Composition: Tether, Banner Shield, Chaos Reach. Bubble/Well not recommended, movement is key.
Team Weapon Loadout: AB snipers, Unstoppable HC/Pulse, Anarchy, Xenophage, Rocket Launchers, Sword.
Safe loadout for Insight Terminus:
Hunter - Tether (bottom-tree) with Aeon Gloves, Assassins Cowl or Fr0st-EE5. Mobility and Discipline armor, 50+ resilience recommended. Bakris Revenant optional.
Warlock - Chaos Reach with Geomag boots. 90+ Intellect armor, 50+ resilience. Shadebinder with Aeon gloves or Verity’s Brow optional, high discipline build for turrets.
Titan - Banner Shield with Ursa Furiosa gloves. 90+ Intellect, high Discipline and 60 resilience. Suppressor grenades and Towering Barricade.
Terminus is also a repeated GM where the boss room can be a challenge. You can not burst down the boss, the adds spawn infinitely and plates have to be captured, requiring good add control loadouts. Invis, banner and stasis will be key to a smooth run. Hunters can potentially run a sword with passive guard to take care of melee adds like warhounds and gladiators. Cellular suppression warmind build will be useful but not necessary if you have a stasis subclass.
Hunters should run an AB scout/sniper, Unstoppable HC/Pulse and have a couple of heavy options - Sword, RL, Anarchy, Xeno. Ticcu’s optional for add control.
Warlocks should run AB sniper, Unstoppable HC/Pulse and Anarchy.
Titans can run AB scout with a blinding GL and Anarchy, or the same loadout as the warlock.
This GM is basically split into two parts - the orb room and the boss room. Invis hunter can be tactically used to skip a few sections. Sparrow through from spawn - the very first barrier hobgoblin can sometimes teleport away, so watch out. The first room has three barrier vex champs, a couple of void shielded minotaurs and a bunch of goblins. You can kill the first two champs with AB snipers, then invis and sneak to the third one and take it out, ignoring the rest of the adds. Or play it safe and clear everything. In the next room with the cabal be very careful about the shotgunners who tend to one shot; and sniper psions who have line of sight from the other side. Either keep at range and clear the adds (use banner shield), or go invis and run through to behind the barrier champ. Watch out for fanatics in the passage leading to the plate. Either way, kill the champ and proceed.
Trigger the boss but don’t get too close, the stomp is an insta kill. Place anarchy traps on the portal and watch out for warbeasts and gladiators. The second spawn will summon two unstoppable champs - try to stun them both asap (explosive HC can double stun) and back away from the plate to avoid knockback. Once they are dead, go through to the orb room. (Killing the adds too fast while capping the plate can sometimes despawn both the unstoppable champs, or worse - double spawn them!) While crouching through the vex arc fluid under the rock, keep left to avoid taking damage. You’ll come across a barrier colossus and some legionaries - good time to use a banner shield and deal with them. Kargen will be on the opposite end near the door, shooting him will summon the next wave of adds and a drop pod with an unstoppable champion. It’s safer to rotate towards the door (near the orb dunk spots) and shoot everything from range. A barrier champ will also spawn during this time and should be killed before killing the unstoppable champ to make the next part easier.
Once the unstoppable champ is dead, it will drop the first orb and more adds will spawn near the dunk point to the right - gladiators, legionaries and a barrier colossus. Move away from the dunk point and deal with them, then grab the orb. Dunking will summon more adds from the vex portals on the sides of the room and three more champions - two barriers and one unstoppable. You can make this part a little easier by placing anarchy traps outside the portals and spawn trapping some adds. There will be sniper psions as well so deal with them from range. Use the area near the dunk spot to clear adds and it’s better to kill the barrier champs before killing the unstoppable, to control the flow of adds.
Picking up the next orb (dropped by the unstoppable champ) will summon a drop pod in the middle with a barrier champ, more adds from portals, and two more barrier champs + adds near the second dunk spot. This part is a little tricky as your movement gets restricted and it’s best to move back towards the area where you entered the big room and clear the adds and solo barrier champ first. Then you can use the middle area and snipe the two barrier champs guarding the dunk spots. The invis hunter can sneak and dunk the orb to make this part a little easier, so you can potentially skip some adds and run through to the boss arena (while invisible). Either way, collect ammo and skip or kill the Vex that spawn after the door opens, and head down to the boss, killing/skipping a few fanatics on the way. It’s worthwhile shooting the vex that the boss destroys so they can drop some ammo for your team.
Start the boss fight by capturing the middle plate. It’s a good idea to use stasis and anarchy traps to keep the adds away from the plate. The banner titan can also move up and block them while two players caps the plate. As soon as the boss drops down, move back and split up - the void grenade attack is deadly and the boss has a one shot stomp if it gets close. Tag anarchy and snipe Kargen from range, and use tether + chaos reach for damage. The adds will keep on spawning indefinitely throughout this encounter (from the three vex portals), be very careful about the warbeasts and gladiators who can get up close and have deadly lunge attacks.
When the boss shields up, it’s time to capture the three plates. This can be done in multiple ways - either stay together and cap them one by one, or split up and cap them two/three at a time if you feel confident. This is a good time to clear adds, collect ammo and build supers. I’ll recommend capping one by one with stasis, banner shield, blinding grenades and anarchy traps. One player can also rotate to the opposite plate and aggro adds away from the plate being capped. Void shielded incendiary cabal will also spawn in the final phase, don’t let them get close as they can launch you into walls and pillars. Use the small pillars at the back of the room to avoid melee adds and snipe the shotgunners. The more players on the cap, the faster it goes. If you clear the melee add wave quickly, you can give yourself some breathing space to cap the plate and collect ammo. When all the plates are capped and the boss drops down for the finale, stay at range and use your heavy and supers to kill Kargen. Tether + chaos reach with anarchy attached can do lots of damage while the banner titan holds aggro and makes orbs for supers. The boss tends to move around erratically when his health gets low so be aware of his movements and void grenade spam. There is a semi-safe spot on the right side of the room that can be used by one player to to hold aggro while the others damage the boss.